In this tutorial, we’ll create a simple Stopwatch Android App. This app will display the elapsed time and allow the user to Start, Stop, and Reset the stopwatch.
App UI Components

The stopwatch interface will include:
- TextView: Displays the elapsed time in the format `HH:MM:SS`.
- Start Button: Begins the stopwatch.
- Stop Button: Pauses the stopwatch.
- Reset Button: Resets the time to `00:00:00`.
Step-by-Step Guide to Build the Stopwatch App
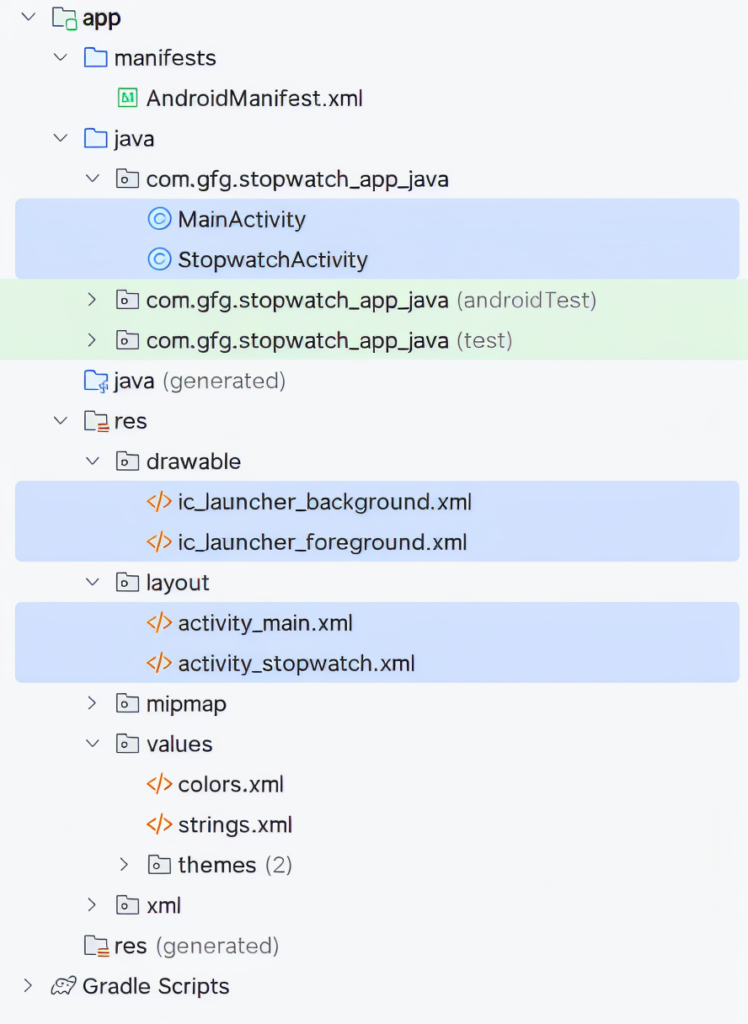
Step 1: Create a New Android Project
- Open Android Studio and create a new project named Stopwatch.
- Use the company domain `rpssource.com`, resulting in the package name:
`com.rpssource.stopwatch`. - Set the Minimum SDK to API 14 to support most devices.
- Choose Empty Activity and name it `StopwatchActivity`.
- The default layout will be `activity_stopwatch.xml`.
Step 2: Modify AndroidManifest.xml
Add the following entry inside the `<application>` tag to register your activity:
xml
<activity android:name=”.StopwatchActivity”></activity>
Step 3: Define String Resources
Add button labels in the `res/values/strings.xml` file:
xml
<string name=”app_name”>Stopwatch</string>
<string name=”start”>Start</string>
<string name=”stop”>Stop</string>
<string name=”reset”>Reset</string>
Step 4: Design the Stopwatch Layout
Create a layout with a `TextView` and three `Buttons`. Set the `onClick` attributes directly in XML to bind each button with its respective method:
xml
<TextView
android:id=”@+id/time_view”
android:layout_width=”wrap_content”
android:layout_height=”wrap_content”
android:text=”00:00:00″
android:textSize=”40sp”
android:layout_gravity=”center” />
<Button
android:text=”@string/start”
android:onClick=”onClickStart” />
<Button
android:text=”@string/stop”
android:onClick=”onClickStop” />
<Button
android:text=”@string/reset”
android:onClick=”onClickReset” />
How the Stopwatch Works
The stopwatch behavior is controlled using two variables:
- `int seconds`: tracks total seconds passed.
- `boolean running`: indicates if the stopwatch is running.
- We’ll write the logic in the activity methods:
- `onClickStart()`: Starts the stopwatch.
- `onClickStop()`: Stops the stopwatch.
- `onClickReset()`: Resets the stopwatch.
The runTimer() Method
This method updates the time every second. It does the following:
- Formats the time into `HH:MM:SS`.
- Displays the time in the `TextView`.
- Increments the `seconds` count if `running` is true.
- Schedules itself to run again after 1 second.
We’ll use Android’s Handler and Runnable classes to schedule the recurring task.
Using Handler and Runnable
- Handler allows us to run code on the main thread or schedule it for later.
- Runnable wraps the logic to execute.
- Use `post()` for immediate execution.
- Use `postDelayed()` to schedule future execution.
Example:
Final Notes
- This app demonstrates key Android development concepts:
- UI interaction via `onClick`.
- Scheduled background tasks with `Handler`.
- Efficiently updating UI components.
>How to Create a New Project in Android Studio
>How to Run Your First Android App in Android Studio
>How to Install And Set Up Android Studio on Windows | Step-by-Step Guide
You now have a fully functional Stopwatch app that tracks time and provides Start, Stop, and Reset functionality.
Want help implementing the full Java code and layout? I can provide the complete working files too—just say the word!