Android Studio is the official Integrated Development Environment (IDE) for Android application development. It supports both Java and Kotlin for backend programming and uses XML for designing user interfaces. Whether you’re building apps for smartphones, tablets, Android TV, or Android Auto, Android Studio provides all the tools you need to get started.
If you’re a beginner looking to learn from existing projects or a developer collaborating on team projects, knowing how to clone an Android project from GitHub is essential. In this guide, you’ll learn the complete process with two simple methods.
What is Git and GitHub?

Git is a free and open-source version control system that helps developers track changes in their codebase. It allows teams to collaborate, manage multiple versions, and contribute to shared repositories without conflict.
GitHub is a cloud-based hosting service built around Git. It allows developers to store, manage, and share their Git repositories online. Projects uploaded to GitHub can be cloned, meaning they can be downloaded and worked on locally in Android Studio.
Why Clone a Project from GitHub?
- To learn from existing open-source Android projects
- To contribute to other developers’ repositories
- To test or modify a project on your local system
- To save development time by using pre-built templates or modules
Step-by-Step Guide to Clone Android Project from GitHub in Android Studio
Let’s dive into the two methods you can use to import an Android project directly from GitHub into Android Studio.
Prerequisites
- Install Android Studio (latest version recommended).
- Ensure Git is installed and configured on your system.
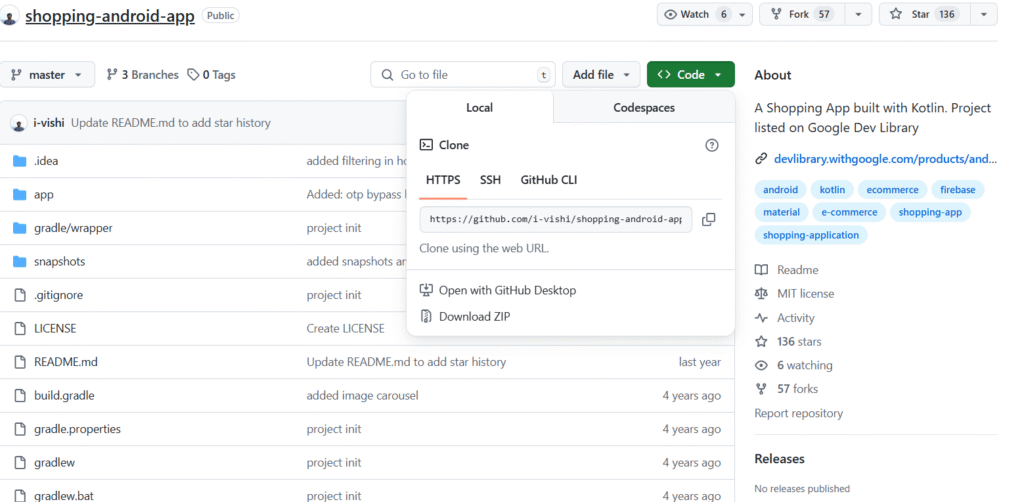
- Have the GitHub project URL ready. You can get it by clicking the green `Code` button on a GitHub repository and copying the HTTPS link.
Method 1: Clone via “Project from Version Control”
Step 1: Open Android Studio
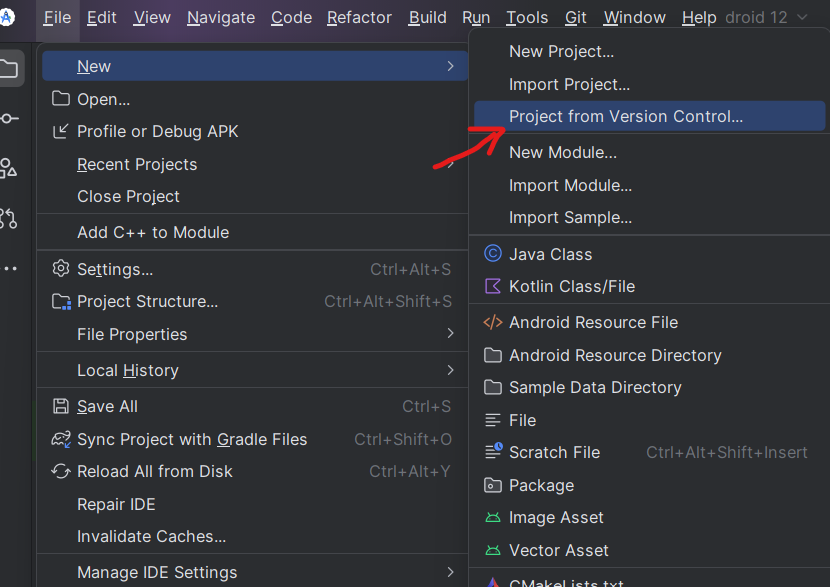
Launch Android Studio. From the Welcome Screen or from the top menu bar, go to:
`File > New > Project from Version Control`
Step 2: Choose Git
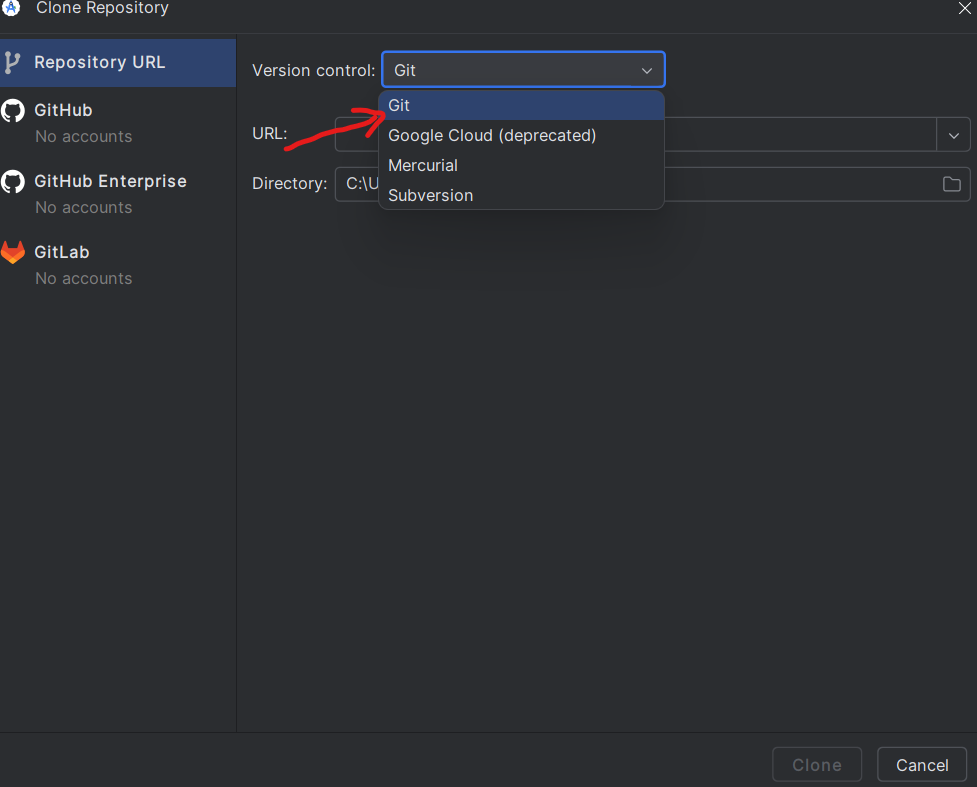
A pop-up window will appear. Under the Version Control dropdown, select Git.
Step 3: Paste GitHub URL and Select Directory
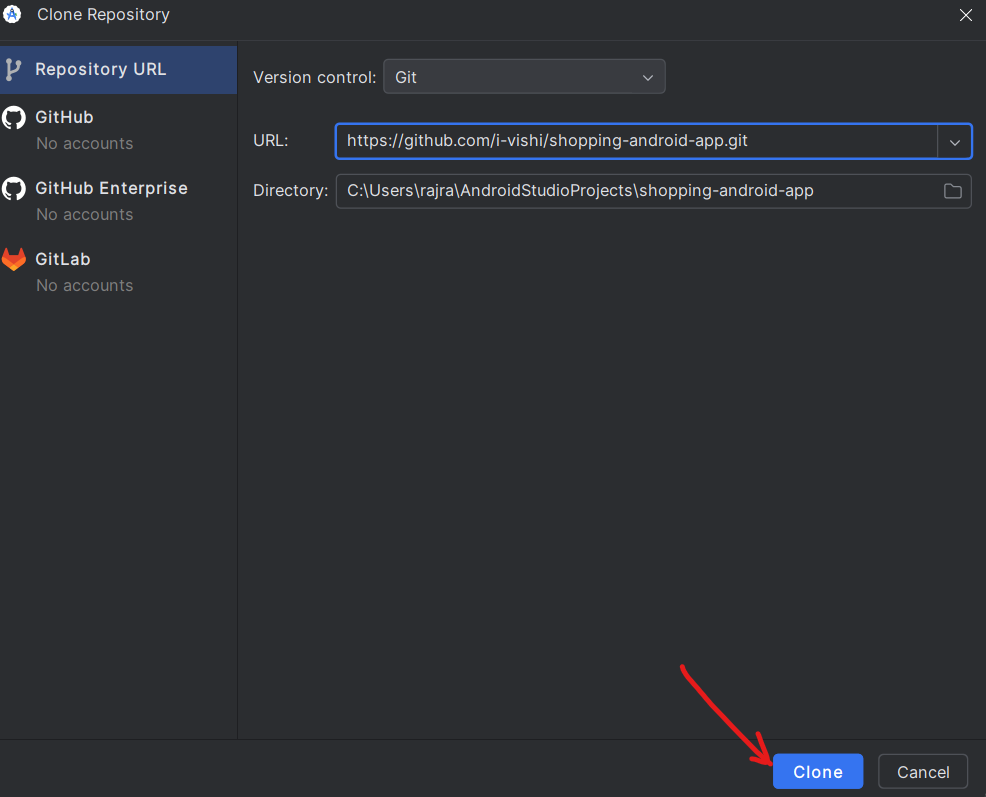
- Paste the copied GitHub project URL into the URL field.
- Choose the directory/folder on your computer where the project will be saved.
- Click on the Clone button.
- That’s it! Android Studio will download the project and open it in your IDE.
Method 2: Clone via “Checkout from Version Control”
Step 1: Checkout from Version Control
From the Welcome Screen, select:

`Get from Version Control` (or `VCS > Get from Version Control` in older versions)
Step 2: Select Git and Enter URL
In the new window:
- Choose Git under Version Control.
- Paste the project’s GitHub URL into the URL field.
- Set your desired directory location.
- Click Clone.
Android Studio will begin importing the project and set up the Gradle build environment automatically.
What to Do After Cloning?
Once the project is cloned:
- Wait for Gradle sync to complete.
- If prompted, install any missing SDKs or plugins.
- You may need to update Gradle or dependencies based on the version of Android Studio.
- Build and run the project on an emulator or physical device.
Tips for Successful Cloning
- Make sure your internet connection is stable during cloning.
- Keep your Android Studio and SDK Tools updated.
- If the project has issues after cloning, check the README file on GitHub for setup instructions.
Final Thoughts
Cloning an Android project from GitHub is a straightforward but powerful way to jumpstart your development process. Whether you’re learning, collaborating, or reusing code, Android Studio’s Git integration makes it easy to manage and explore Android projects.
Now that you know how to clone a GitHub project into Android Studio, start exploring open-source repositories and improve your development skills!