If you’re developing Android apps, integrating GIT with Android Studio is crucial for version control and team collaboration. This article will guide you step-by-step on how to install and use GIT in Android Studio, from configuration to pushing your code to GitHub or other remote repositories.
Why Use GIT in Android Studio?
GIT is a distributed version control system that helps you track changes, collaborate with other developers, and manage code history. By integrating GIT with Android Studio, you can:
- Track every change you make in your codebase
- Revert to earlier versions when needed
- Collaborate easily using GitHub, GitLab, Bitbucket, etc.
- Avoid losing code due to accidental changes or crashes
Step 1: Install GIT on Your System

Before you can use GIT in Android Studio, you need to install it on your computer.
For Windows:
- Download the installer from the official website.
- Run the installer and follow the instructions.
- Select “Git from the command line and also from 3rd-party software” during installation.
- Once installed, open Command Prompt and type:
“`bash
git –version
“`
This should return the installed version number.
For macOS:
Use Homebrew:
“`bash
brew install git
“`
For Linux:
Use your distro’s package manager:
“`bash
sudo apt install git # Debian/Ubuntu
“`
Step 2: Configure GIT

After installing GIT, configure your identity using the command line:
“`bash
git config –global user.name “Your Name”
git config –global user.email “youremail@example.com”
“`
This information will be used for your commits.
Step 3: Enable GIT Integration in Android Studio
- Open Android Studio
- Go to File > Settings (on Windows/Linux) or Android Studio > Preferences (on macOS)
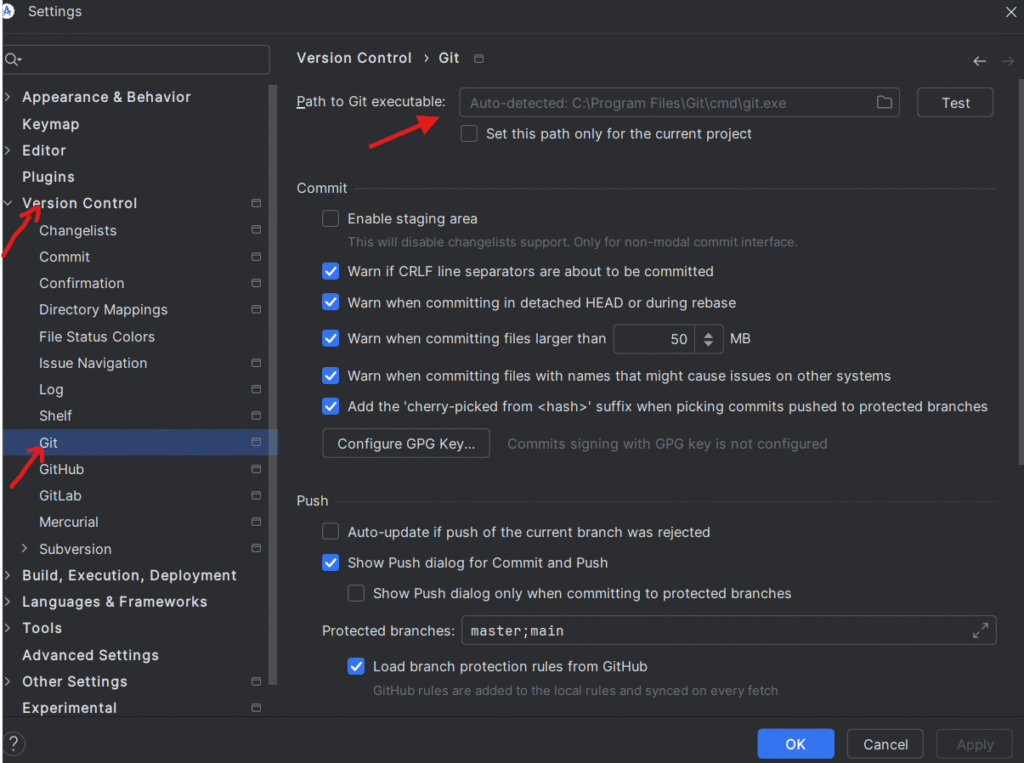
- Navigate to Version Control > Git
In the Path to Git executable field, set the path:

- Windows: Usually `C:\Program Files\Git\bin\git.exe`
- macOS/Linux: `/usr/bin/git` or use the `which git` command in terminal
- Click Test to verify the path.
- Click Apply and OK
Step 4: Initialize a GIT Repository in Your Project
If your Android project is not yet under version control:
- Open your project in Android Studio
- Go to VCS > Enable Version Control Integration
- Choose Git from the dropdown
- Android Studio will now initialize a `.git` repository in your project
Step 5: Add and Commit Your Code

Once GIT is enabled:
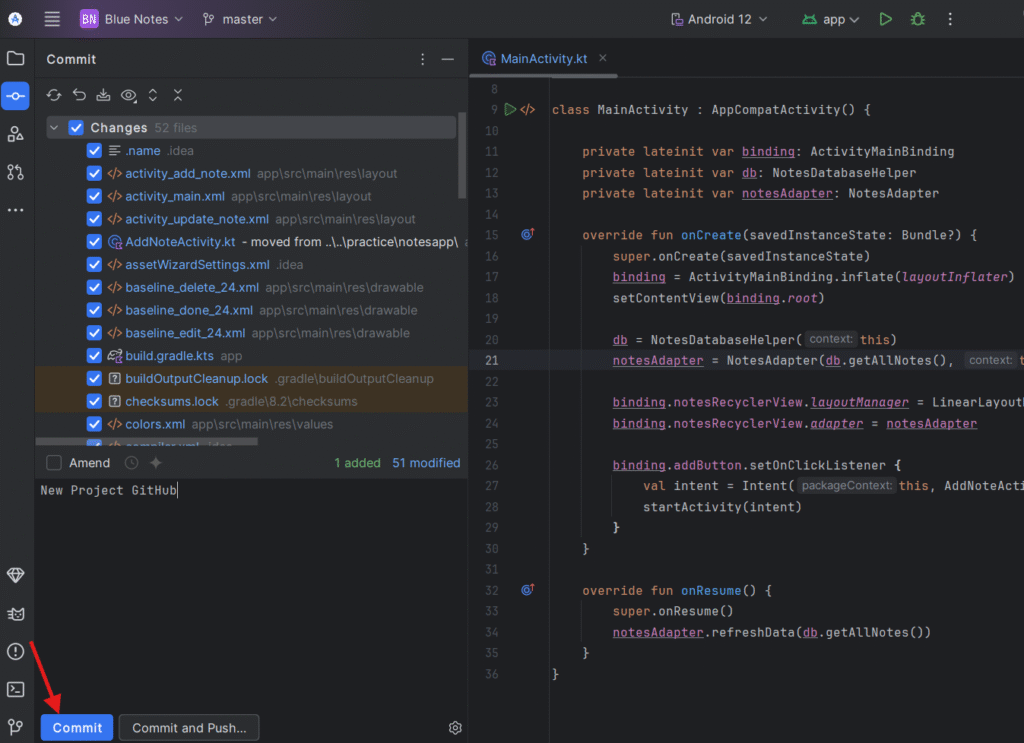
- Go to VCS > Commit
- Select files to commit or click Commit All
- Add a commit message
- Click Commit
If you want to commit and push at once, click the dropdown and select Commit and Push
Step 6: Connect to GitHub or Remote Repository
To push your project to a remote repository like GitHub:
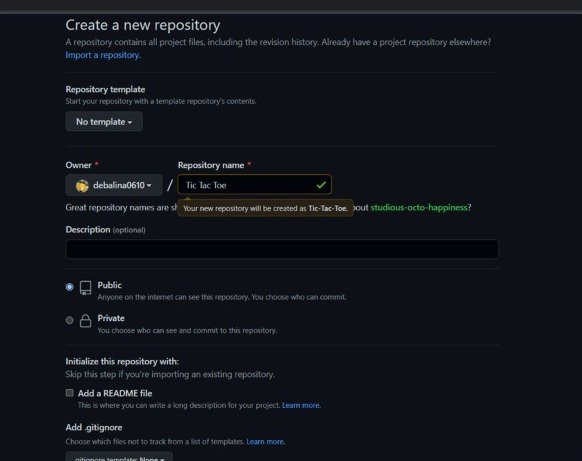
- Create a GitHub Repository
- Go to github and create a new repository.
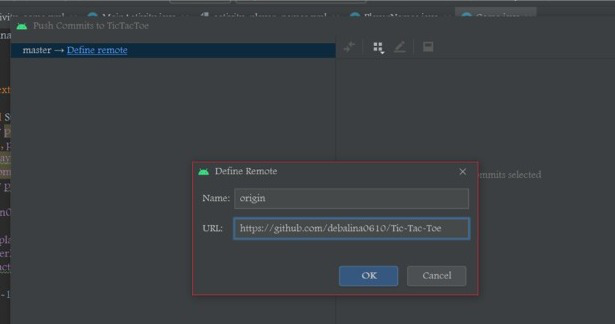
Add Remote in Android Studio
- Go to VCS > Git > Remotes
- Click + and add your GitHub repository URL (e.g., `https://github.com/username/repo.git`)
- Click OK
Push Your Code

- Go to VCS > Git > Push
- Review changes and click Push
Step 7: Clone a Project from GitHub
To clone a project directly from GitHub:
- Go to File > New > Project from Version Control
- Select Git
- Enter the GitHub URL and local directory
- Click Clone
Common Git Commands in Android Studio
Command
- Commit
- Push
- Pull
- Merge
- Branching
Usage
- Saves your changes locally
- Sends commits to the remote repository
- Fetches and integrates changes from remote
- Combines different branches
- Create or switch branches for separate features
Final Tips
- Always pull before you push to avoid conflicts
- Use .gitignore to exclude build files, logs, and unnecessary directories
- Commit often with meaningful messages
Conclusion
Integrating GIT with Android Studio streamlines your development workflow, ensures safer coding practices, and makes team collaboration much easier. Whether you’re working solo or with a team, mastering GIT in Android Studio is a must-have skill for every Android developer.
Start using GIT in Android Studio today and take control of your code!