
Are you starting Android app development with Android Studio? Before you begin, installing the Java Development Kit (JDK) is essential. The JDK is the core requirement for compiling and running Java-based applications in Android Studio. In this guide, we’ll walk you through how to install the JDK step-by-step, with tips to ensure smooth Android Studio integration.
What is JDK and Why is It Important for Android Studio?
The Java Development Kit (JDK) is a software development environment used to build Java applications. Android Studio, the official IDE for Android development, relies on Java for many of its core features and functionalities. Without the JDK, Android Studio can’t run Java code or Android apps effectively.
Key components of JDK
- Java Compiler (javac)
- Java Runtime Environment (JRE)
- Java APIs
- Java Debugger
SEO Tip: Including keywords like “JDK for Android Studio,” “install Java JDK,” and “Java setup for Android Studio” improves ranking in search engines.
System Requirements
Before installing the JDK, ensure your system meets the following requirements:
For Windows:
- Windows 10/11 (64-bit)
- Minimum 4GB RAM (8GB recommended)
- At least 2GB free disk space
For macOS:
- macOS 11 or later
- ARM-based or Intel processor
For Linux:
- Ubuntu, Fedora, Debian, or CentOS (64-bit)
- GNU C Library (glibc) 2.27 or later
Step-by-Step: How to Install Java JDK for Android Studio
Step 1: Download the JDK
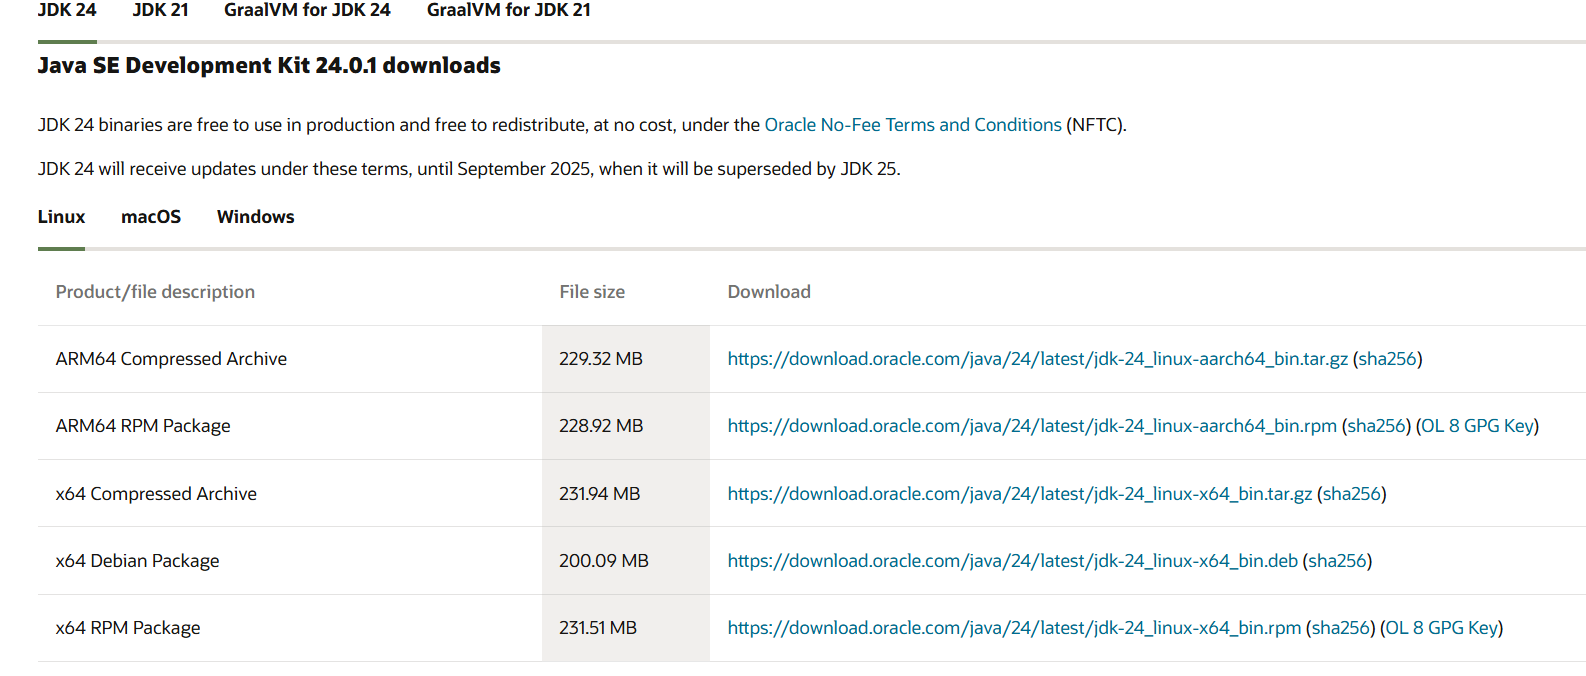
- Go to the official Oracle JDK Download page
- Choose your operating system (Windows, macOS, Linux)
- Click on the .exe or .dmg file to download
Alternative: You can also use OpenJDK, which is free and open-source. Visit
Step 2: Install the JDK
On Windows:
- Run the downloaded .exe file
- Follow the installation wizard
- Note the installation path (e.g., C:\Program Files\Java\jdk-XX)
On macOS:
- Open the .dmg file and run the installer
- JDK will be installed in /Library/Java/JavaVirtualMachines
Step 3: Set JAVA_HOME Environment Variable
This helps Android Studio locate the JDK.
Windows:
- Open System Properties > Environment Variables
- Under System Variables, click New
- Name: JAVA_HOME, Value: C:\Program Files\Java\jdk-XX
- Add %JAVA_HOME%\bin to the Path variable
macOS/Linux:
Add this to ~/.bash_profile or ~/.zshrc:
- bash
- Copy
- Edit
- export JAVA_HOME=$(/usr/libexec/java_home)
- export PATH=$JAVA_HOME/bin:$PATH
Then run:
- bash
- Copy
- Edit
- source ~/.bash_profile
Step 4: Verify JDK Installation
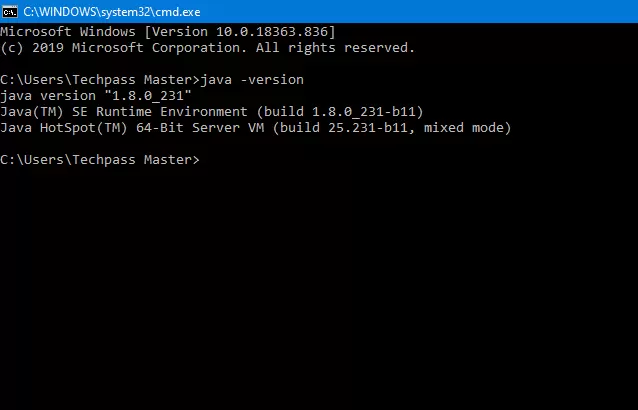
Run the following command in your terminal or command prompt:
- bash
- Copy
- Edit
- java -version
- javac -version
You should see the installed JDK version output, confirming success.
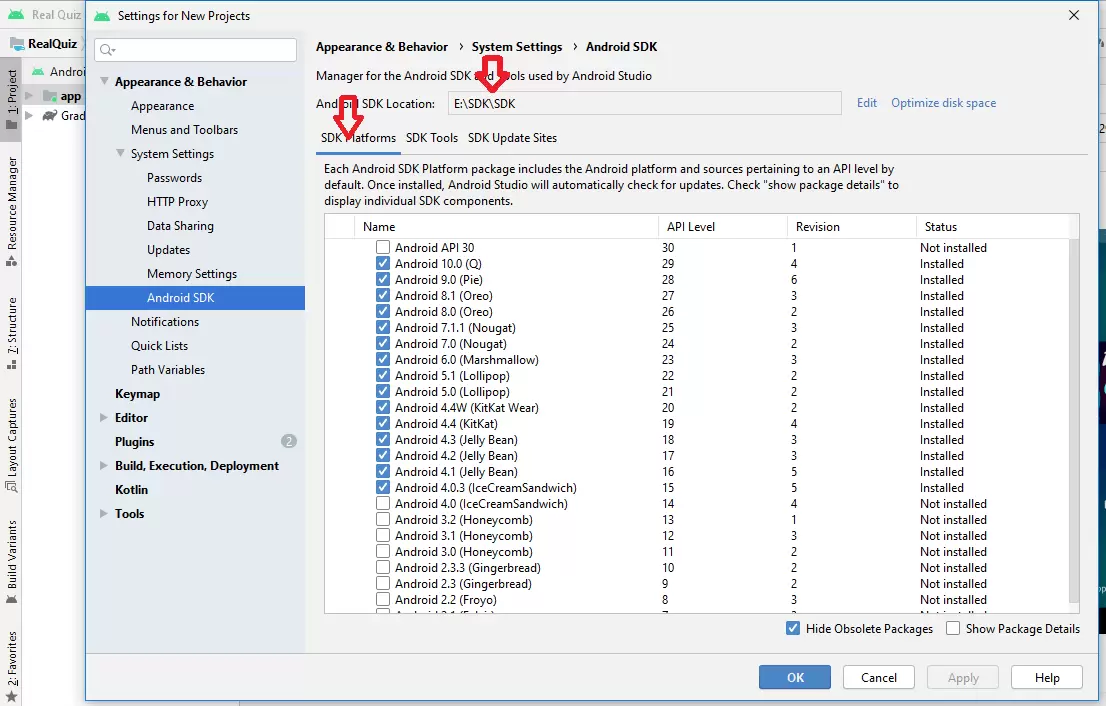
How to Connect JDK with Android Studio
- Open Android Studio
- Go to File > Project Structure > SDK Location
- Set the JDK location to your installed path
- Click Apply and OK
Android Studio often comes bundled with a compatible JDK, but configuring your own gives you more control and flexibility.
Recommended JDK Version for Android Studio
- JDK 11 is the most stable and recommended version for Android development as of 2025.
- Avoid JDK 17+ unless you know specific compatibility needs.
Common JDK Installation Issues
- Error: “JDK Not Found”
- Check that JAVA_HOME is set correctly.
- Ensure the path points to the JDK, not the JRE.
- Android Studio Crashes or Freezes
- Verify if the installed JDK version is compatible.
- Use OpenJDK or stick to JDK 11 for best compatibility.
Final Thoughts
Installing the Java Development Kit is the first step toward becoming a successful Android developer. With the JDK set up properly, you’ll be able to compile, debug, and run Android apps using Android Studio with ease. Always use a stable JDK version like JDK 11 and keep your environment variables correctly configured.