
If you’re a developer working with Android Studio, you might often need to reopen a project that you’ve previously worked on or downloaded from another source like GitHub. Whether you’re a beginner or a professional, knowing how to open an existing project in Android Studio is essential for maintaining your workflow.
In this article, we’ll walk you through the simple steps to open an existing Android Studio project. This guide is perfect for developers, students, and freelancers working on Android apps.
Why You Might Need to Open an Existing Project
- You downloaded a project source code from GitHub or another developer.
- You are returning to a paused app development project.
- You want to contribute to an open-source Android application.
- You switched computers and want to continue your work on another device.
Prerequisites
Before opening an existing project in Android Studio, make sure you have:
- Android Studio installed on your computer.
- The project files already downloaded or copied to your local drive.
- A basic understanding of how Android projects are structured (e.g., Gradle, Java/Kotlin files, manifest, etc.).
How to Open an Existing Project in Android Studio

Follow these step-by-step instructions:
Step 1: Launch Android Studio
- Open Android Studio by clicking the icon from your desktop or start menu.
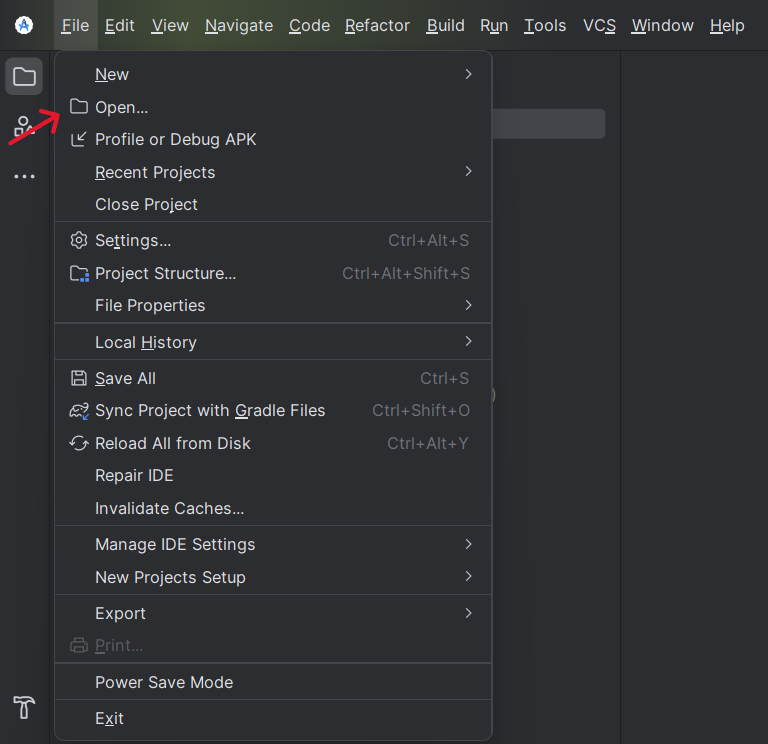
Step 2: Click on “Open” Option
- From the Android Studio welcome screen, click on the “Open” option.
- If you are already inside another project, go to File > Open.
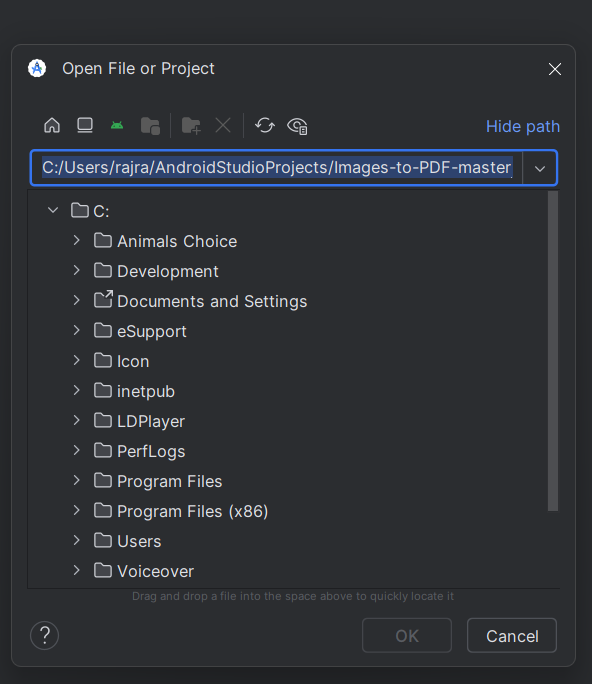
Step 3: Locate the Project Folder
- Navigate to the folder where your project is saved.
- Select the folder that contains the `build.gradle` file (not just any subfolder).
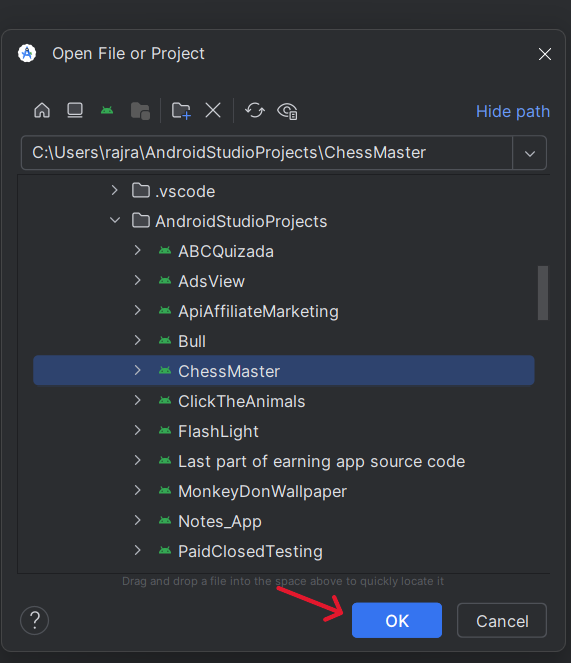
Step 4: Click “OK” or “Open”
Once you’ve selected the correct folder, click OK or Open depending on your OS.
Step 5: Let Android Studio Index the Project
- Android Studio will begin indexing the files.
- It might take a few minutes depending on the project size and your system speed.
Step 6: Sync Gradle (If Prompted)
You may be prompted to sync Gradle. Click on “Sync Now” to allow Android Studio to download dependencies.
Common Issues and Fixes
Gradle Sync Failed
- Check if the internet is working.
- Make sure the `build.gradle` files are not corrupted.
- Update Gradle or use the Gradle wrapper.
Missing SDK
- Go to File > Project Structure > SDK Location and ensure the path to your SDK is correct.
- Android Plugin Compatibility Issue
- Update Android Studio and plugins to the latest versions.
Tips for Managing Existing Projects
- Use Git: Version control with Git helps track changes and collaborate easily.
- Clean and Rebuild: If you face any issues, go to Build > Clean Project then Rebuild Project.
- Use Virtual Devices: Test the app on different emulators.
Final Words
Opening an existing Android Studio project is a straightforward process, but small missteps can lead to errors. By following the above steps, you can seamlessly load, edit, and run Android projects on your system.
If you’re regularly working with shared source code or multiple machines, mastering this process is crucial for efficiency and productivity.